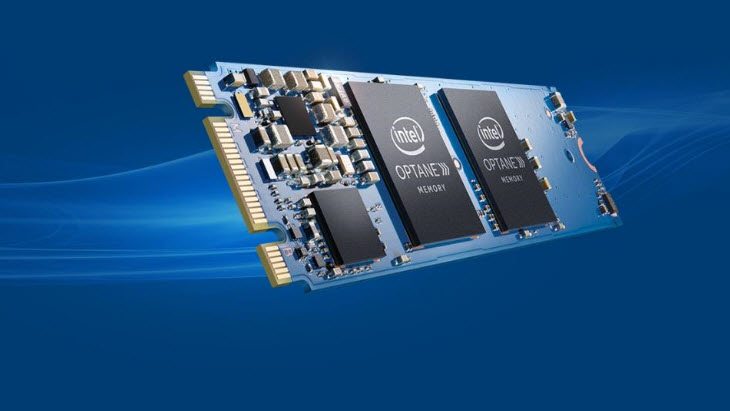
I picked up a 32GB Intel Optane memory module a couple of weeks back and the installation process has been an “experience”. Easy this isn’t yet, though I expect they will improve it over time otherwise they’ll likely see many customers return the product. However, once in, this thing is AMAZING and worth the trouble it took to get it installed. I can cut down on your aggravation a lot and [inlinetweet prefix=”” tweeter=”” suffix=””]I’ll share with you just why I think Optane Memory is a game changer.[/inlinetweet]
SSDs
Optane is the Intel branded name for the generic class of 3D XPoint Memory. This is solid state persistent storage with speeds that approach system memory. Flash, or SSDs—the most common form of solid state memory today—was substantially faster than magnetic disk and those of us that swapped to it early on saw a big boost in system and application load times as a result. But SSDs have a number of performance issues, not the least of which is they wear out.
SSDs are still the speed king for the desktop at capacity, though, and it’ll likely be awhile before any but the very well-off use anything else for much of their storage capacity on a laptop or desktop.
3D XPoint
Jointly developed with Micron, Optane is the Intel brand name for 3D XPoint memory. Basically, it is a storage medium which looks to the system, at least in its desktop form, like an SSD but behaves more like system memory in terms of latency or perceived speed. Currently you can buy it in 16 and 32 GB sizes and the sizes have different performance characteristics. The smaller size has lower latency but slower data speeds the larger size faster data speeds but higher latency. I went with the 32 GB unit which at $77 is a small price for what looked like a big speed increase.
Experience
While you could use the Optane module as a small high-speed drive (be aware it needs to go on an Optane ready motherboard that has been flashed with the update that supports Optane and it uses an M.2 slot, more on that later). Once installed and after you have loaded your most used applications a couple of times so the system knows which files to cache the load times drop like a rock. I play Ashes of the Singularity and typical load times are long enough for me to go grab coffee. With Optane they are down to barely long enough to glance at email. Word files are nearly instantly opened once created and anything loaded more than once seems to get a huge performance boost. (That “once” part is providing a level of lust for a full Optane Drive I wasn’t expecting).
My primary drive is a new 500 GB Samsung Evo unit and the Optane addition significantly sped it up, right now it comes down to the best $77 I ever spent. However, getting this thing to work wasn’t easy.
Installing Optane
This is a generation one product and the biggest problem is that the supplied instructions are nearly worthless. Had I known two things before I started, installation would have been far easier so let me share those two things. First, even though the Optane module is M.2, Optane only works with SATA drives for now. If you have an M.2 drive you’ll need to swap it out right now. Second you need a small 5MB partition at the end of your primary drive for the Optane utility to use. And it must be at the end of the drive, if you use the drive manger in Windows it will likely place the partition before rather than after the recovery partition and that won’t work. This was surprisingly difficult to do as I first had to create the partition in the Drive Manager then use a third-party tool (AOMEI Partition Manager) to move it to the end. Until this was done the Intel Optane utility wouldn’t install. Now, once installed, you must open the utility to enable the memory which will force a reboot. Go grab coffee and come back later as this takes a while and you may think you PC is broken during the process (I did but I just had to wait for the installation process to complete). Once in and running it is non-invasive, it just works in the background making things faster.
Wrapping Up: Best $77 Upgrade Ever!
Now that the product is in [inlinetweet prefix=”” tweeter=”” suffix=””]I must admit this is likely the best $77 I’ve ever spent on a gaming PC.[/inlinetweet] I’m particularly impressed with the game load times and now I want a full Optane drive because I have a need for speed and apparently that need is pronounced enough for me to want to push the envelope farther. I should also note that this initial Optane effort is below what 3D XPoint is thought to be capable of so future products not only will likely get cheaper but faster as well. For some strange reason, I have no problem with that—no problem at all.
- The Mighty Mini: Why HP’s Z2 Mini G1a Workstation Is the Unsung Hero of AI Development - July 7, 2025
- The HP OmniBook X Flip 2-in-1 16-Inch: Your New Digital Swiss Army Knife (Now in Glorious Atmospheric Blue) - June 25, 2025
- The Open AI Avalanche: Why AMD’s Collaborative Spirit Is Outmaneuvering NVIDIA’s Empire - June 22, 2025


Thank you for every other informative website. Where else could I get that kind of information written in such an ideal means?
I’ve a challenge that I’m simply now working on, and
I have been at the look out for such info.
Really wonderful visual appeal on this website,
I’d value it 10.
Just installed a 32 Gig Optane stick paired with a 4T WD Black mechanical drive. System is blazingly fast, this is the real virtue, you get to have a huge drive that runs like an SSD.
Another thing to look out for more to do with M.2 slots, if your board has multiple M.2 like the Aorus 5 Gaming, some of them may disable SATA ports if used, this is not what you want if you have a stack of drives, you can just choose the correct M.2 to use with the Optane but it might be an issue if you’re using your other M.2 slots.
Strange, I didn’t have the problem with having to move the 5mb space, I just created it during the Windows 10 installation.
System is just gorgeous to use and I wouldn’t ever go back, not even to an SSD. The day when we can all have Optane drives as storage will be a literal game changer.
I almost never comment, but after reading some of the comments here Intel Optane Memory: Pain To
Install But Oh So Worth It. I actually do have some
questions for you if you do not mind. Could it be only me or do a few of the comments look like they
are coming from brain dead visitors? 😛 And, if you are posting on additional places, I’d
like to keep up with you. Could you list of every
one of all your social community sites like your Facebook page, twitter feed, or linkedin profile?
Yes, for some reason the bots found this post and must have really liked it. Most of the comments were auto posted I think. I’m at @enderle on Twitter, I post a link to most everything I write. Thanks for following!
How long did it take yours to initially set up? Mine’s been crunching away for hours…. but I’m excited. I have the 32gb model.
Once I got the partition set at the end of the hard drive volume it was basically done. The OS did the rest. I didn’t experience a long setup at all but I know they were going to adjust the software, this sounds like Intel screwed something else up. Basically this works like a cache, it shouldn’t be churning noticeably at all.
Just found your post. I have data on the 4TB that I want to accelerate, will switching from AHCI to Intel RST Premium delete that data? Does everything need to be reinstalled fresh? i.e. OS and everything else?
I didn’t need to do that. Setting the small empty partition as the last volume on the drive is a pain but unless your drive is at capacity you shouldn’t experience data loss. However whenever you are messing with a drive always back it up first unless you can afford to lose the files or already have backup copies. Be aware this works like a cache which means if you aren’t accessing the same files over and over again you won’t see a performance increase. For instance if I’m playing the same game back to back the boot times are amazing but if I wait a couple days those files drop out and the game boots the way it used to with little or no impact from Optane.
This partition in the end must be formated? Which file system?
I don’t recall having to format the partition, the installation tool just needed to see the partition in the right place. I haven’t installed Optane since I wrote this piece, hopefully the process has improved by now.
Note to all:
When cloning your boot hard drive for a reliable backup…
When in windows (10 in my case ) Disable the optane memory and reboot without it.
Then reboot into your cloning software (via dvd, cd, usb boot disk) and only then clone the boot disk.
After the clone is complete, reboot into your OS and re-enable the optane.
(just a tip)